Thursday, May 23, 2024

Shiny Blocks and Boat Holes

I was happy to receive a package from Xometry (online CNC machine shop) and find the new tie rod blocks I designed exactly as specified and after a test fit I was relieved that everything fit well.  They will be replacing the old ones that are in varying states from good to terrible and the 7075 aluminum coupled with hard anodization should provide many years of service. 

As you can see in the photo to the left, the old ones (the 2 in the center) are in less than perfect condition and one of them is literally crumbling apart. It was definitely time to replace them.  I'm really pleased with how they turned out and I was even more impressed with how easy it is to turn a design into a finished product.  All you need to do is load a CAD drawing to the Xometry site, pick materials, finishes, spec tolerances (there are a number of levels going from prototype to mil spec).  You can also choose production location (some companies require U.S. made products).  Although none of this is cheap (I paid $460 for 6 blocks), it was likely less than what I would have paid locally, and the only supplier that I know of (rigrite.com) has photos of the blocks but no price listed and based on the cost of other discontinued items they have for sale, it would have cost a fortune.  

Anyway, while that was happening I was busy building the G10 chainplate 'islands'.  Originally, I was going to have these sent to Xometry as well, but I have enough tooling on hand to machine G10 plates myself. The design was simple (see last post) and using a series of jigs that I 3d printed, I was able to cut out perfect oval shapes and round over the corners for the tops and then glue the top and bottom (the part that inserts into the deck) together to make the final assembly.  For the bottom inserts, I used .5" G10 that I had leftover from my Alberg project (G10 is expensive), so I saved some money there.  All told, I spent $28 for .25" G10 plate for the top section and $40 for a new .5" flush cut router bit. Everything else I had on hand.  Once everything was cut out, I epoxied the top and bottom halves together and tapped the holes for the deck mounted chainplate.

Once that was completed, it was time for the scary part: cutting holes in the deck so the assemblies would fit, leaving the top flange resting on the surface.  Again, I employed a series of 3d printed jigs to locate and mark the cutout area and then used a hole saw and oscillating cutter to remove the top skin and inner core without removing the bottom skin on the underside of the deck.  This was really the only tricky part because it was hard to tell exactly how far to drill without damaging the bottom skin. I opted for a conservative approach and left the cut about 0125" proud of the bottom skin and used a chisel to get the remaining core out.  The good news was that despite clear water intrusion into the boat, the core was not wet (or rotten), just compressed.  After I chiseled out the bottom part of the core and cleaned everything up, I fit the assemblies and was delighted to find that the bolt holes lined up nicely and the top flange covered up the hole.  

The last thing to do was to epoxy it all in. I cut out 2 layers of biaxial fabric to epoxy to the bottom skin, wet them out and laid them in before starting on the assemblies.  For the assemblies, I decided to use Thixo, the ready to go epoxy from TotalBoat that uses a standard caulking gun with a mixing tube to glue everything up. It is much more expensive than raw epoxy, but it keeps mess to a minimum and has a long working life.  With that said, I spent alot of time taping the holes from the underside of the deck and then taping a large area around each hole so I didn't get epoxy all over the deck.  Once ready, I cleaned up all the mating surfaces with acetone and then splooged a bunch of epoxy into the holes and onto each assembly (I did these one at a time).  Then I simply mashed the assembly into the hole until epoxy squeezed out the edges of the flange.  Finally, I cleaned up the squeeze out with a tongue depressor and weighted each assembly down and left for the day.  Once everything had kicked the next morning I pulled the tape and and test fit the chainplate on each 'island'.  I still have to paint them and of course get all the chainplate/tie rod assemblies bolted back in, but I'm really happy the way this project turned out.  I think it's a solid design that will prevent core compression and the raised chainplates will discourage water from entering.


Sunday, May 5, 2024

I Didn't See That Coming

Now that the engine is happily rebuilt and running, I've started planning for what I need to do to get it back in the boat.  This is a huge task that brings the phrase "How do you eat an elephant" to mind.  The answer is of course: "One bite at a time", so the first bite in the process is to get the tarps and part of the frame off to make overhead room for hoisting the engine back in.  

Unfortunately, the deck isn't wateright at this point and that needs to be done before the tarps come off, so I guess the real first bite is: Getting the deck watertight.  The hatches and most of the deck equipment are well sealed and I have re-plumbed the scuppers, but the chainplates are out of the boat and all 7 chainplate assemblies and underdeck tie rods have to be reinstalled.  On paper, it seems like a simple job, but reality always gets in the way.

I pulled the chainplate assemblies out of storage and took them apart to see if anything needed replacing. I should note that these are not your standard stainless or bronze bar chainplates that fit through a slot in the deck and bolt to a bulkhead. These are NavTec chainplates which consist of a deck plate with 2 bolts that go through the deck and connect to an aluminum block which connects to a tie rod which connects to a bulkhead mounted chainplate.  

In theory, they are a nice solution because you don't necessarily need a bulkhead located directly where the chainplate goes through the deck.  They also only have 2 bolt holes that go through the deck and are easier to seal than a slotted bar with a rectangular hole in the deck.  However, what I found when I took apart the chainplate assemblies was less than ideal.

Most of the NavTec chainplate system is made up of nitronic 50 which is essentially a super corrosion resistant stainless steel (better than 316) and a yield strength nearly twice that of 316 stainless.  All of these parts look brand new and will be re-installed as is, but there is an aluminum backing block that ties the above-deck chainplate to the tie rod and on 4 of the 6 blocks, I found serious corrosion that would need to be addressed in several ways.

First, the backing blocks would need to be replaced, but I wasn't able to find a source for replacement so I decided to digitize the blocks and have new ones machined.  I haven't used CAD in years so I was pretty rusty but my son has a Autodesk Inventor license and he helped me get up to speed on the software and once I got the hang of it, I was able to get it done without issue.  To make sure my design was within tolerances of the originals, I 3d printed one of the blocks in PLA to make sure everything fit and once I was satisfied (I did a few iterations), I sent the designs off to a machine shop to CNC them out of 7075 aluminum with a hard anodized coating.

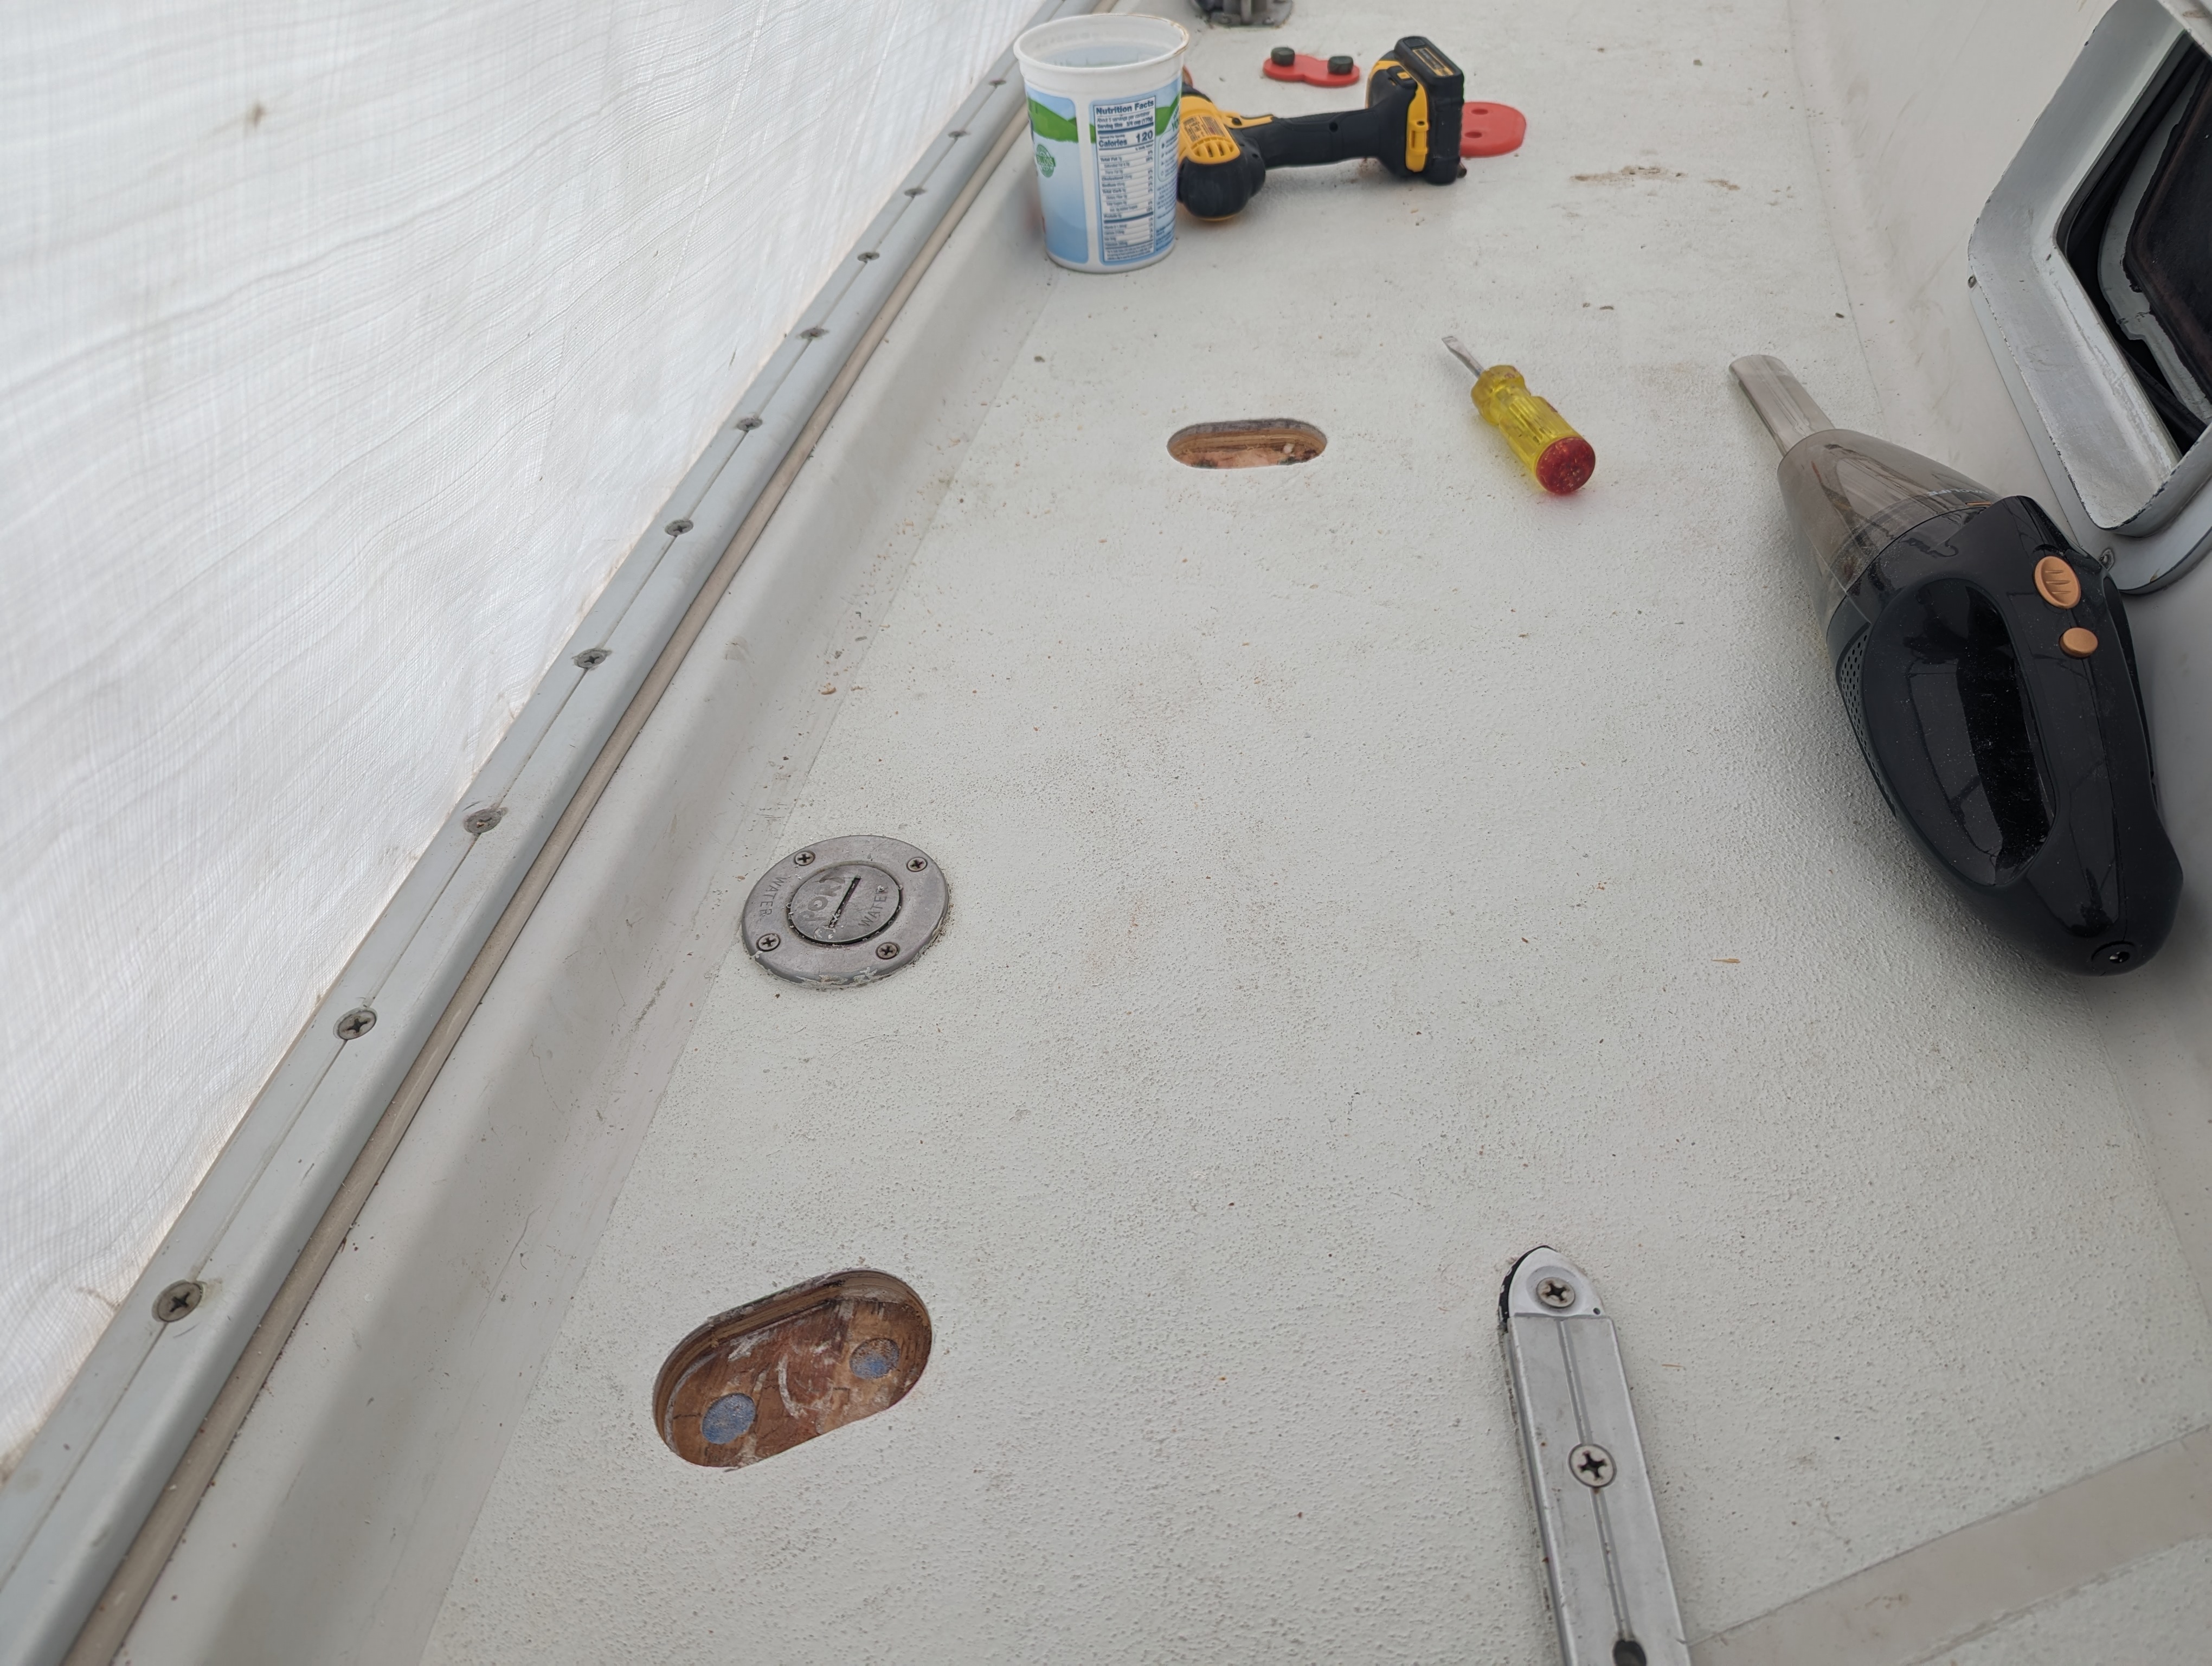
The second, and more concerning issue was why the blocks corroded in the first place. The only way that could happen was if water was making its way down from the deck to the blocks mounted underneath.  A quick inspection of the deck revealed that the core underneath the chainplates on deck was crushed (probably from overtightening the tie rods that attach to the bulkheads).  I was surprised that an area as crucial as the chainplates would have a plywood core and not solid glass, but I shouldn't be surprised by that sort of thing anymore.  The Niagara is a well built boat and a lot of thought went into isolating through hulls from the core, but I feel that they missed the mark with deck fittings.  Time to get to work.

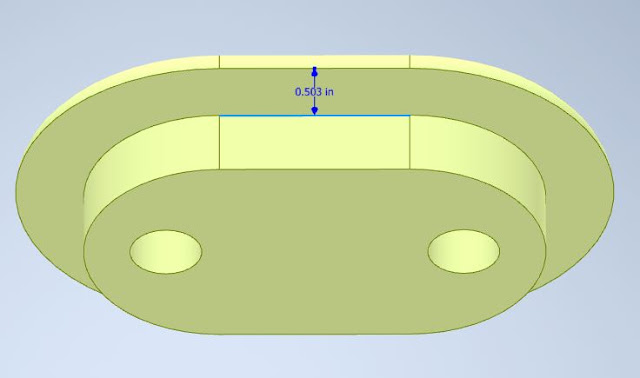
When I re-cored the decks on my Alberg 35, I epoxied in 9 layers of 1708 biaxial cloth where the chainplates went through the deck so no core could be exposed. While this was effective, it was part of a bigger, messier job so I didn't have to be careful about the surrounding deck surface.  For this job I wanted to do something similar, but without having to re-core the whole deck.  After some discussion on several online forums, I settled on the idea of creating oval inserts with flanges made of G10 plate that would replace the existing deck top skin and core material.  The inserts would be .25" proud of the deck and would create an 'island' around each chainplate that would help keep water out of the holes.  I drew up a schematic of what I wanted it to ultimately look like and then did a few 3d prints to make sure my measurements were correct before I started cutting expensive G10 plate for the actual installation.  Next time I'll go into the gory details of cutting holes in deck and epoxying the 'island' inserts into place.