As part of my effort to get the top of the boat waterproof so I can remove the cover for the engine install, I started knocking items off the list that I posted last week. We had some warmish temps over the past few days so I was able to get all the opening hatches (5) and opening ports (6) regasketed. The hardest part of the job was getting the old gasket and sealant out (see last post for details).
Once the hatches and ports were prepped, installing the new gaskets was actually pleasant. Just cut the correct gasket based on the perimeter of the hatch channel, lay in a bead of Silaprene and press the gasket in place. Once it's seated, just close the hatch and clamp it down. 24 hours later the Silaprene had cured and the gaskets were locked in place. Easy peazy and the Silaprene was nice to work with.Moving on to other holes in the deck, Steph and I tackled the handrails. I had removed the handrails last fall and brought them home over the winter to clean up and re-varnish (12 coats) before re-installing. Originally, I had big plans to change the way they were affixed to the deck, but never got around to it. The handrails as designed were screwed in from the underside of the deck with 2 woodscrews in each mounting point. Hinterhoeller did do a nice job providing holes in the headliner to access each screw, but the rails really should have been through bolted for a number of reasons. The original design team incorporated a lot of well thought out ideas for the Niagaras, but using wood screws for handrails was not one of them.- Through bolting provides a much stronger connection than wood screws.
- Allows easier mounting of the rails since the longer handrails are curved and need to be bent into place.
- Gives more sealant options. I'm a big fan of butyl tape for sealing through bolted connections, but you can't provide enough compression force for butyl tape with wood screws
Anyway, I settled on using the woodscrews again and it was a bit of a bear to get done. Starting at the aft end, we mounted the smaller handrails (4 mount points) without too much issue because they were straight and didn't have to be bent in place. We taped off the area around the rails and I laid down a bed of 3M 4200 sealant on the rail and then set it in place. Steph was on deck holding the rail in position while I screwed up from the bottom, gradually tightening each one. The larger handrails (7 mount points) were much trickier because Steph had to hold the rail in place until I got the first 2 mounts screwed in. Then she carefully bent the rail inward and I moved to the next one. The hard part was keeping the next few mounting points off the deck so the sealant didn't smear everywhere. We managed, but I can't say that it was my best job. They are solid and should be watertight, but the sealant looks a little janky in spots.
 |
| Handrails installed |
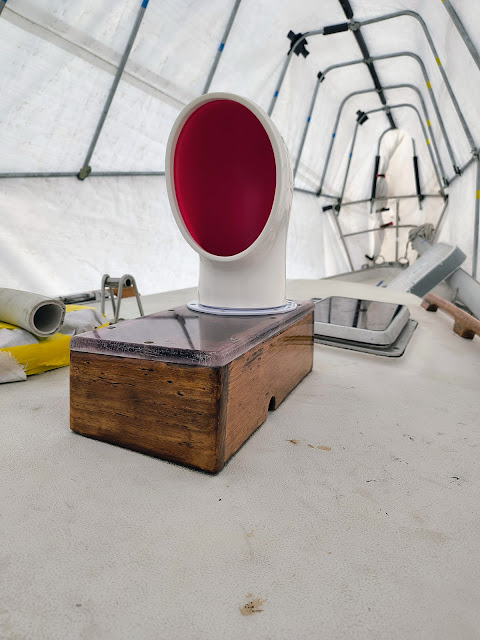
Like the handrails, I brought the dorade vent home to clean up and varnish over the winter. When I removed it last fall, it was screwed directly to the deck and appeared to be penetrating the cabintop core. When it came time to reinstall, I overdrilled the holes and filled them with slightly thickened epoxy and let it cure. Once cured, I re-tapped the holes so there would be no water intrusion into the core going forward. Tapping around the 4 mounting points didn't reveal any core issues and when I overdrilled the holes, the wood chips coming out were dry, so I think I caught it before it became a problem.
Reinstalling was just a matter of applying sealant where the screws penetrate and screwing the box back into place. Then I sealed the lexan cover with silicone (clear) and screwed that down along with the new cowl.


